In this tutorial we are going to host our ASP.NET Core app on Kubernetes. We will be using Minikube which is a tool that runs a single-node Kubernetes cluster on your personal computer. It supports all OS including Windows, macOS & Linux. The installation procedure is given at here. Note that you should have Docker installed on your pc.
Page Contents
I will be installing minikube on my Windows 10 Home edition, the procedure remains all the same for other OS to. I already have Docker Desktop running on my PC which is needed by minikube. So first we will download minikube installer file from minikube website then double click it to instal on the system.
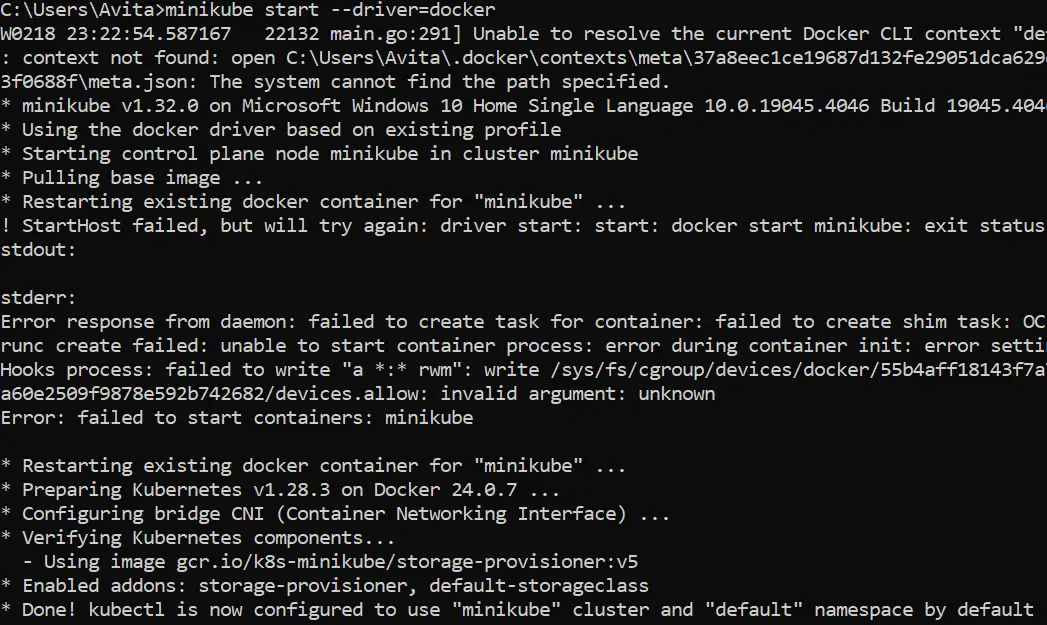
Next, on your command prompt run the minikube start command which will start minikube on your system.
minikube start --driver=dockerMinikube will download kubernetes and create the cluster. It will take 10 to 15 minutest depending upon your internet speed. After that you will receive a message which basically suggest that minikube is working properly and configured with kubectl. See the below image where I have shown this message.
Then run the minikube status command which tells the necessary Kubernetes components are running.
minikube statusCheck the below screenshot:

The working of Minikube with Docker containers is slightly different. Minikube actually creates a Virtual Machine (VM) inside docker and within this Virtual machine it runs the docker containers. Check the below diagram which explains this:
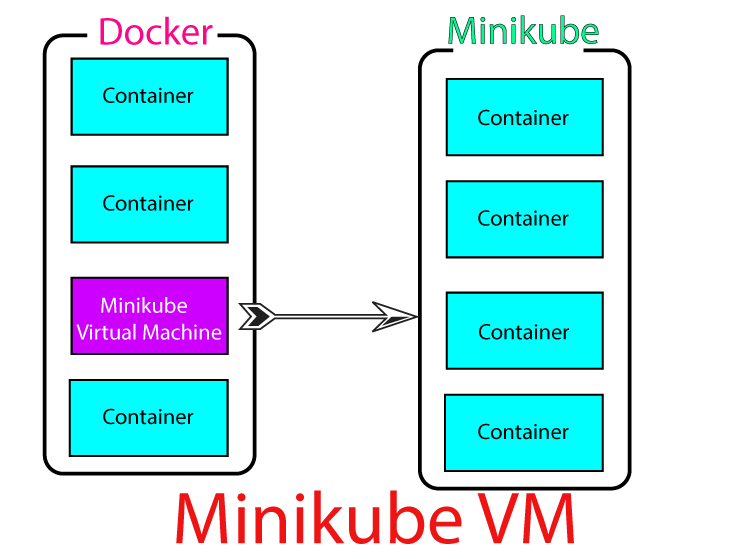
This also means minikube only access the docker containers running inside the VM and not which are outside of VM. So, when working with minkube you have to first enter this VM and there you create docker containers. Then you do other tasks like creating Kubernetes Pods, Deployments, Services, Ingress and so on.
Let’s see how you enter Minkube’s VM. If you are in windows then enter the following command on your command prompt window and press enter.
minikube docker-envThis command will show you environment variables created by minikube. You copy and paste the last one (which is @FOR /f "tokens=*" %i IN ('minikube -p minikube docker-env') DO @%i) on the command prompt and press enter. This will take you inside the VM created by Minikube. Check the below image:

Now you can enter docker ps command which will show you all the containers running inside this VM.
For linux and macOS you can just enter the command which is given below on the terminal to enter minikube’s VM.
Eval $(minikube docker-env) So just remember that when we will create ASP.NET Core app which will be hosted on Kubernetes pods then we will be doing these steps:
The procedure to exit minikube vm is very simple. Just close the command prompt window and open a new one. The new command prompt window will be outside the minikube vm.
Now to test this, run docker ps command which will show you the containers that are inside the local docker instance and not the ones that are inside the minikube’s docker instance.
Let’s create a new ASP.NET Core MVC app. Open Visual Studio and select MVC template.
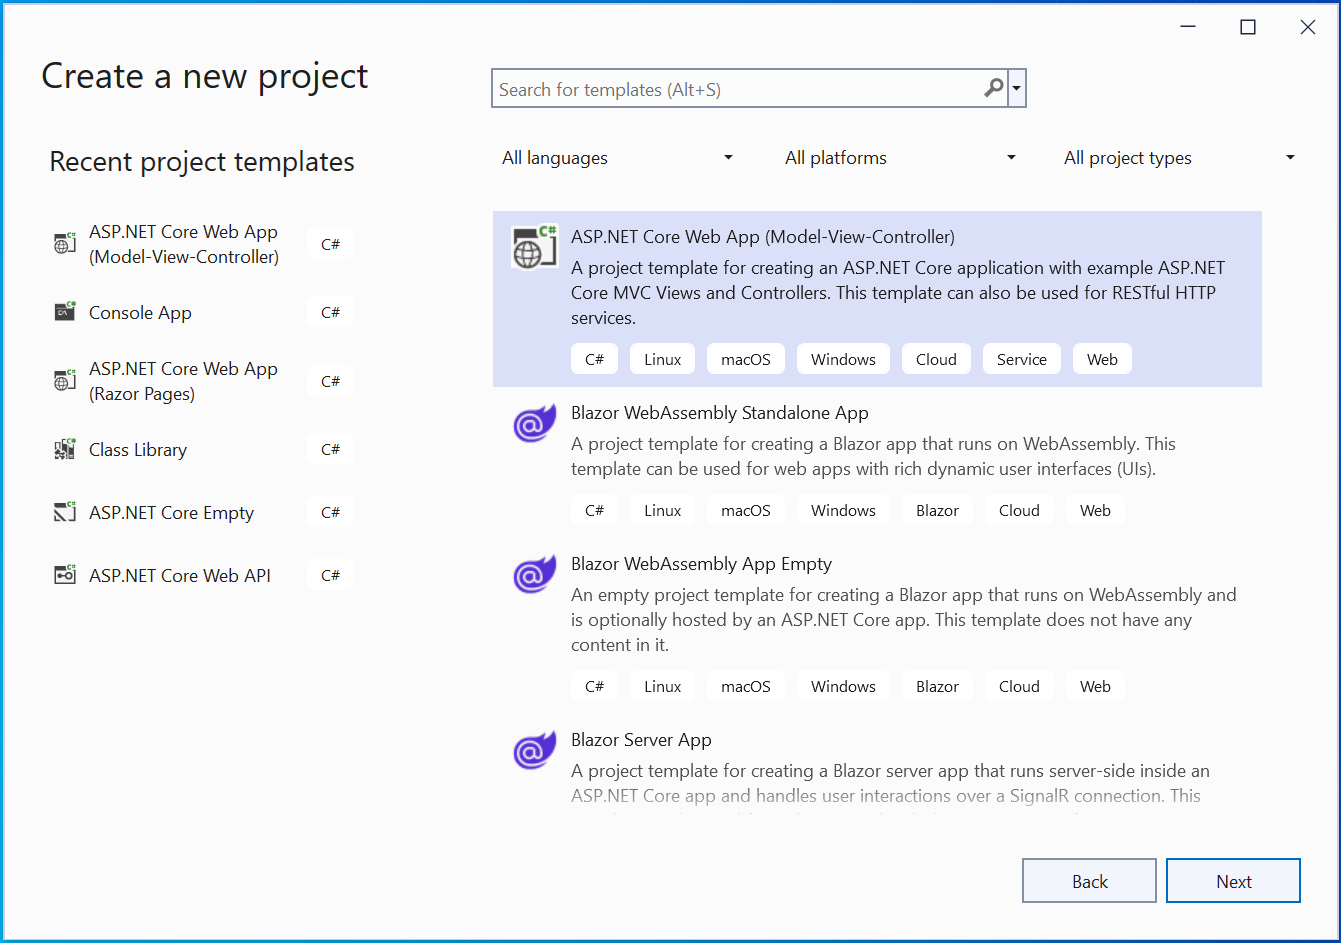
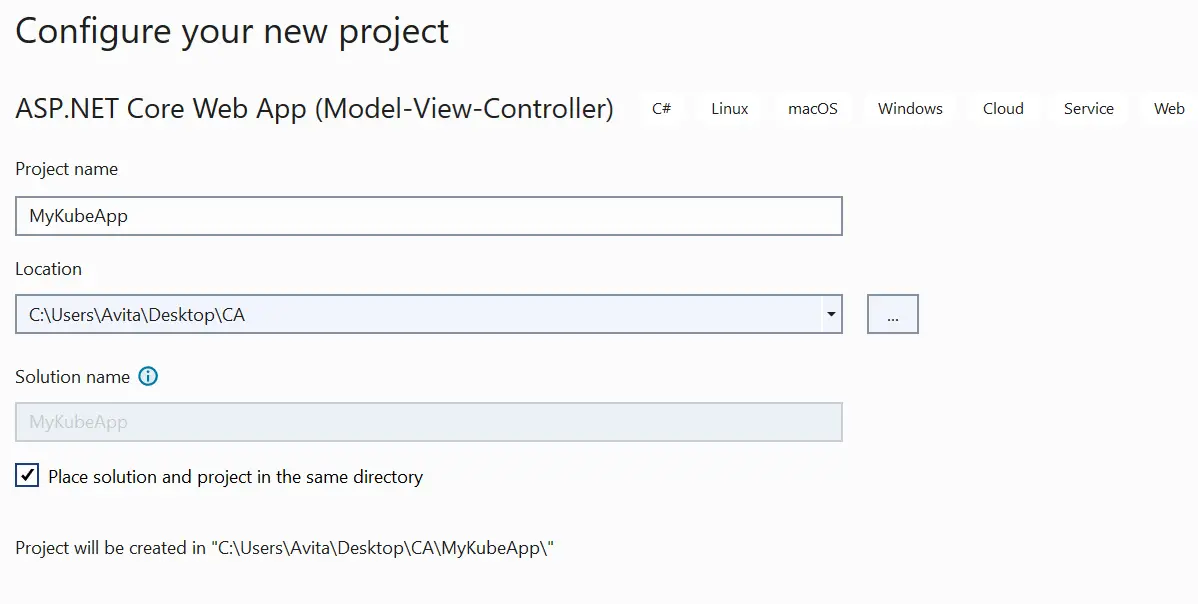
Name the app MyKubeApp, and make sure to “check” the option that says –Place solution and project in the same directory.
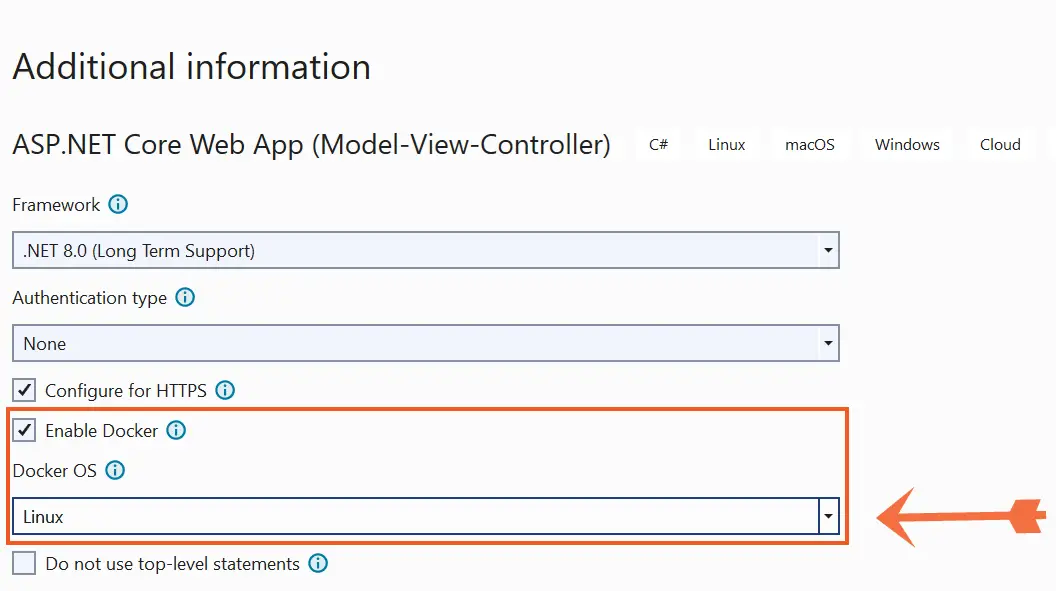
On the next screen you will see Docker option. Here select the checkbox – “Enable Docker” and select “Linux” for Docker OS.
Visual Studio will create the app along with the Dockerfile and it also downloads the .NET image from docker hub. Once all the necessary images are downloaded, close the Visual Studio as we will continue the work from the command prompt.
Recall that in our command prompt window, we are already inside the Minikube VM. If you opened a new command prompt then you have to first enter the Minikube VM. Next, go inside the directory where our app is located. In my case it is C:\Users\Avita\Desktop\CA\MyKubeApp. So with cd command given below I go inside this directory.
cd C:\Users\Avita\Desktop\CA\MyKubeAppNext, run the docker build command given below. This will create our app image by the name of mykubeappimg.
docker build -t mykubeappimg -f Dockerfile .I have shown this in the below image.
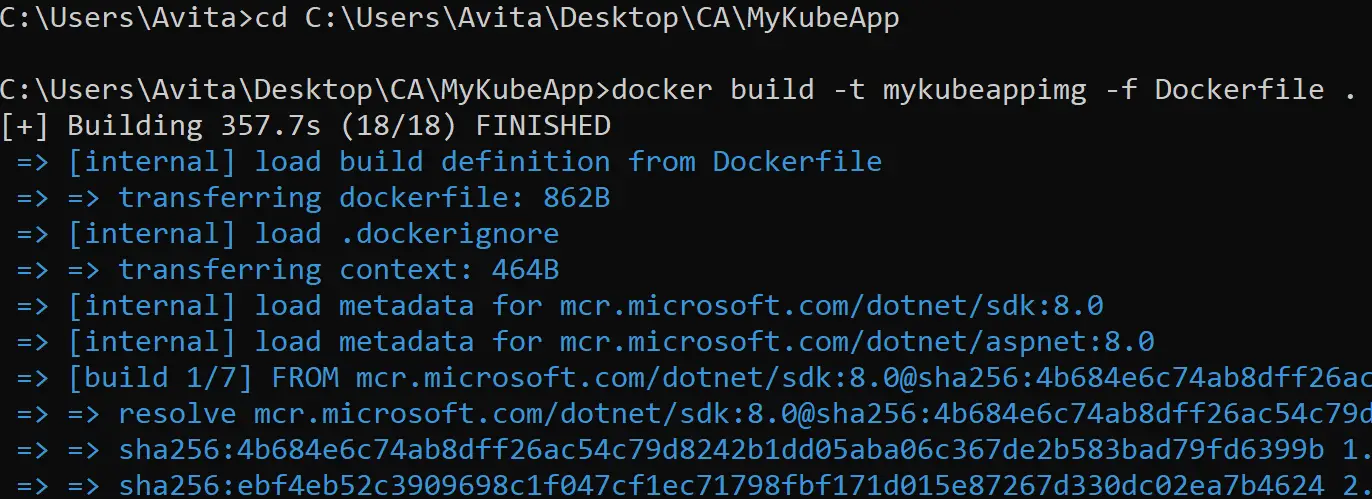
Run the docker images and we see “mykubeappimg” in the list.

A Kubernetes Pods are smallest execution unit. Pods contain one or more docker containers which are running our app. See the below image.
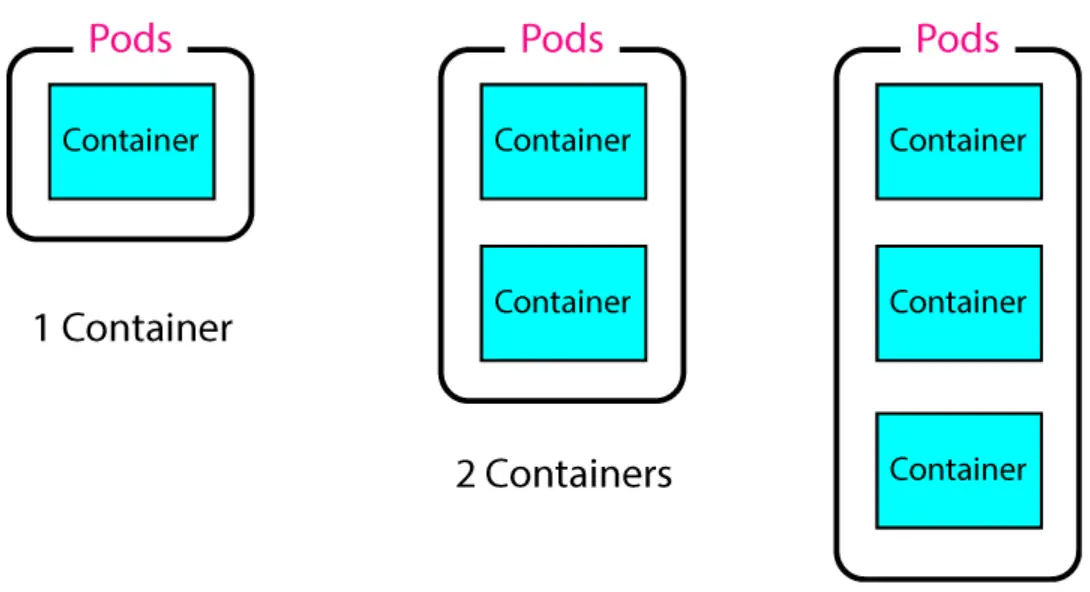
We can created Pods with Kubernetes Deployments.
We will now straight go to kubernetes and create a deployment file. So create a new file called mydep.yaml anywhere in your pc. It’s name can be anywhere just need to have .yaml extension. Open this file on notepad and add the following code to it.
apiVersion: apps/v1
kind: Deployment
metadata:
  name: first-dep
  labels:
    app: aspnet-core-app
spec:
  replicas: 1
  selector:
    matchLabels:
      component: web
  template:
    metadata:
      labels:
        component: web
    spec:
      containers:
        - name: mykubeappcont
          image: mykubeappimg
          imagePullPolicy: Never
          ports:
            - containerPort: 8080
The name: first-dep specifies the name of this deployment which I have given as “first-dep”. Also see the “containers” section defines the name of the docker container it will create which is “mykubeappcont” and the docker image “mykubeappimg” which it will use.
containers:
  - name: mykubeappcont
    image: mykubeappimg
    imagePullPolicy: Never
    ports:
      - containerPort: 8080
We also defined the docker container port number 8080 to be openend.
In the command prompt go to the directory of this deployement file and run the following command to create the deployment on kubernetes.
kubectl apply -f mydep.yamlNext, run the below command to see the deployment is created.
kubectl get deploymentsAfter this run the get pods commad to see that the pod is created and it is running the docker container running our .NET app.
kubectl get podsI have shown all this in the below image.
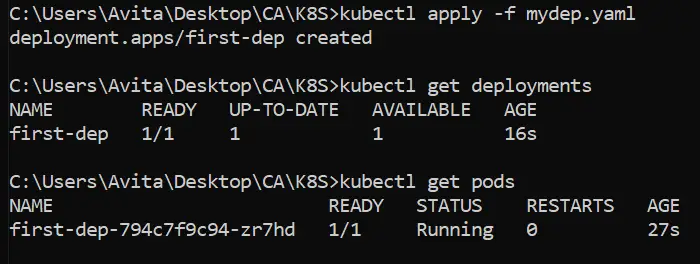
Now run docker ps command to see that the docker container is created for our app.

To be more specific we can run pods describe command – kubectl describe pods first-dep-794c7f9c94-zr7hd, here “first-dep-794c7f9c94-zr7hd” is the name of my pod, to get detailed information about the pods.
Below is a small portion of the information regarding the image and container the pod is using.
Events:
  Type    Reason     Age   From               Message
  ----    ------     ----  ----               -------
  Normal  Scheduled  26m   default-scheduler  Successfully assigned default/first-dep-794c7f9c94-zr7hd to minikube
  Normal  Pulled     26m   kubelet            Container image "mykubeappimg" already present on machine
  Normal  Created    26m   kubelet            Created container mykubeappcont
Normal Started 26m kubelet Started container mykubeappcontA Kubernetes Service exposes our app which is running on a Pod to Kubernetes Cluster. With service we will be able to access the app on the browser with an IP Address.
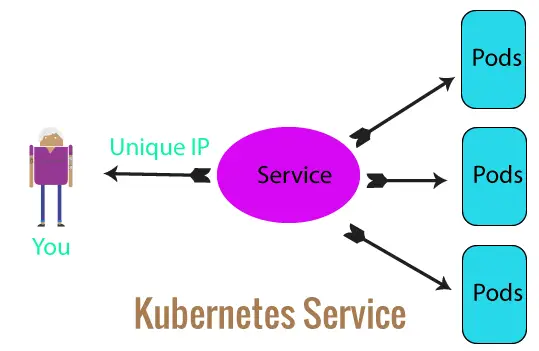
So create a file called myservice.yaml with the following code.
apiVersion: v1
kind: Service
metadata:
  name: first-service
spec:
  type: NodePort
  selector:
    component: web
  ports:
    - port: 9999
      targetPort: 8080
The service is given the name “first-service” from name: first-service, and is given port as 9999 which will be the service port and this port is mapped to the 8080 port of the container.
The component: web inside the “selector” tells the service should target all the Pods that have the label “component: web”. Check the deployment yaml file where we have provided the pods the same label.
Now in the command prompt, run the below command to create the service.
Kubectl apply -f myservice.yamlNext, run the command given below to view all the services:
Kubectl get servicesYou can see the service “first-service” is present there.

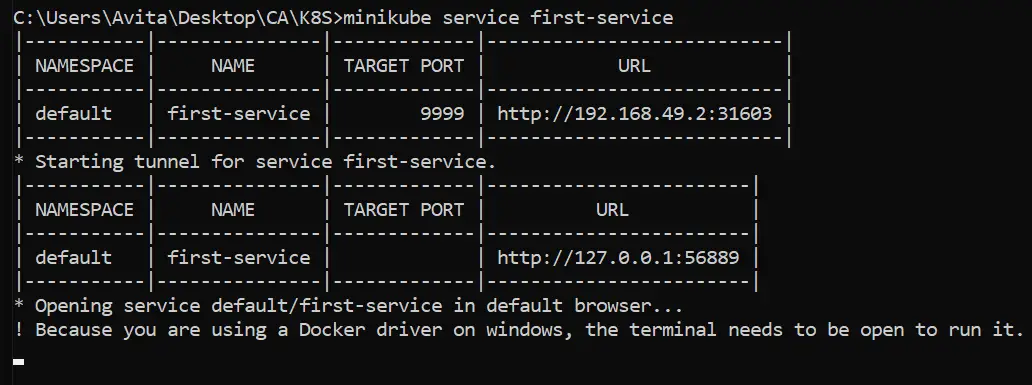
To access a service on the browser run the minikube service first-service command on command prompt. It will open a tunnel and then a new tab is opened on the browser where you you will see your ASP.NET Core app.
Check the below image where I have shown this commands.
The below image show the app is now accessible on the browser.
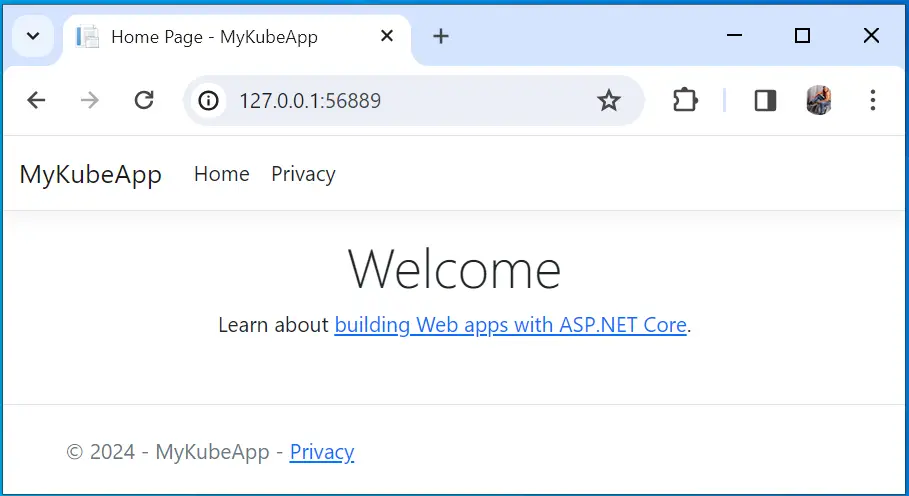
Your app will open on the browser and you can access it. To exit from the tunnel press “ctrl+c” on the command prompt and it will close the tunnel and your app will now become in-accessible.
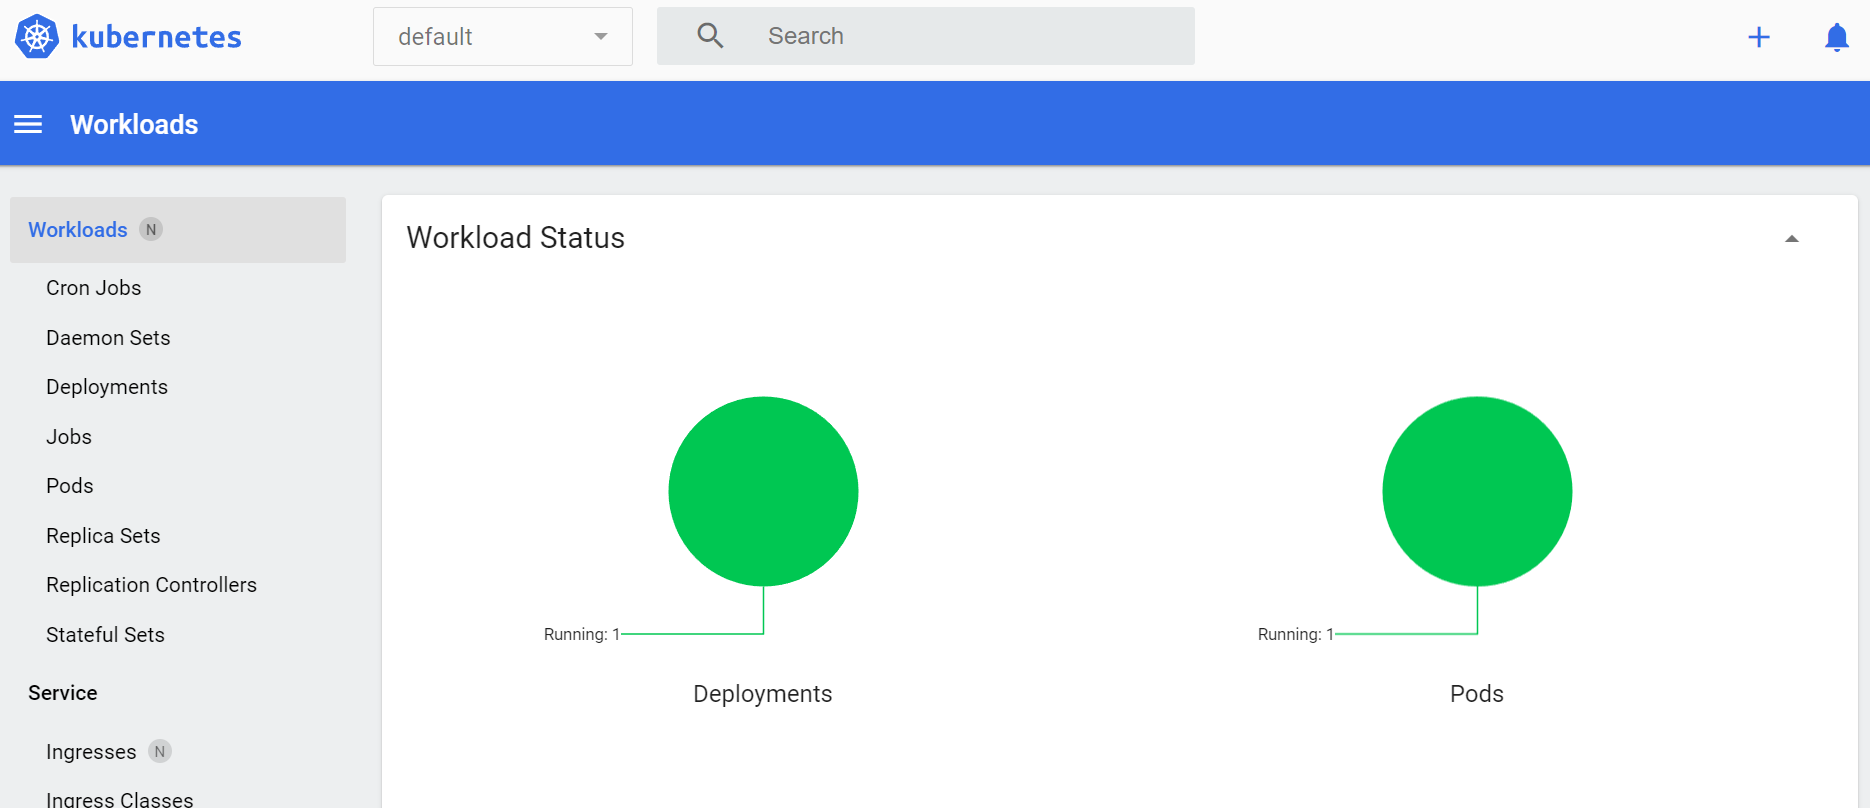
Minikube Dashboard is a web-based UI for managing your Kubernetes cluster and applications running on K8S. Some useful things that you can do with the minikube dashboard are:
See the below screenshot of the dashboard UI.
To access Minikube Dashboard run the below command on the command prompt.
minikube dashboard It will open the dashboard on the proxy in the default web browser.
To stop the proxy i.e. abort the started process press ctrl+c on command prompt.
In the below screenshot, we are showing the minikube dashboard UI.
You can also get the minikube dashboard’s url and then copy and paste it on the browser. To get the minikube dashboard’s url run the following command:
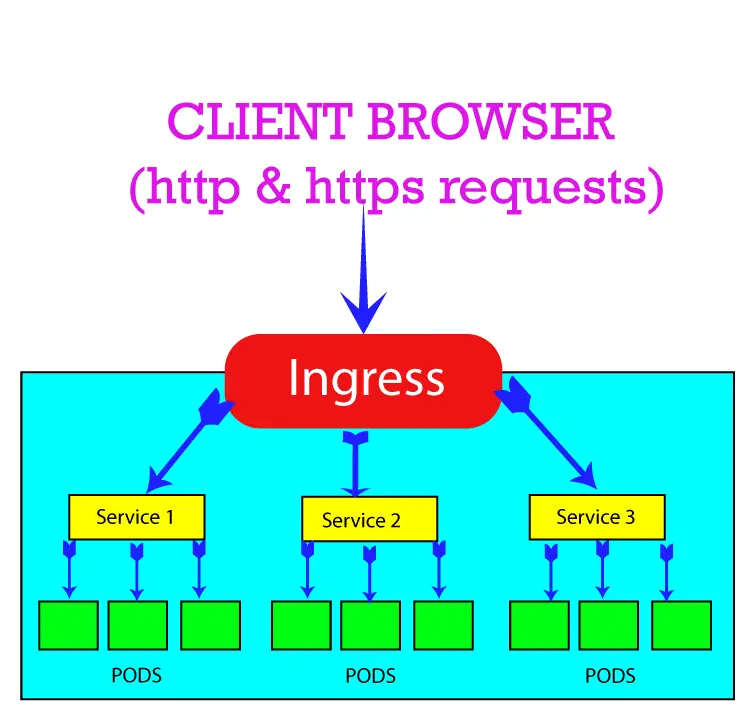
minikube dashboard --urlA Kubernetes Ingress exposes a service to outside world with http and https protocols. See the below image of an Ingress
First we have to enable the Nginx Ingress Controller by the below command.
minikube addons enable ingressThe controller will be downloaded and you will get a message – The ‘ingress’ addon is enabled.

Next, we create kubernetes ingress. So create a new file called myingress.yaml and add the following code to it.
apiVersion: networking.k8s.io/v1
kind: Ingress
metadata:
  name: first-ingress
  annotations:
    nginx.ingress.kubernetes.io/rewrite-target: /
spec:
  ingressClassName: nginx
  rules:
  - host: hello-world.info
    http:
      paths:
      - path: /
        pathType: Prefix
        backend:
          service:
            name: first-service
            port:
              number: 9999
The ingress has been given a name “first-ingress” and it is targetting “first-service” see code – name: first-service. The ingress will be called from the domain hello-world.info. You can change the host value to your domain.
Apply the ingress to kubernetes by the below command.
kubectl apply -f myingress.yamlNext, run the below command to see the ingress is created.
kubectl get ingressCheck the below image.

Now you can open your domain in the browser and your ASP.NET Core app should be accessible.
In this tutorial we hosted our ASP.NET Core app to kubernetes from start till end. We used minikube to create kubernetes cluster on our pc. We also learned to create Docker Image for our app and also understood how kubernetes pods, deployments, services and ingress are used to host our app. Hope you liked this tutorial so kindly share it with your friends.
SHARE THIS ARTICLE