In the last tutorial we build our first Microservice for drone pizza delivery application. That Microservice was called by the name CommandCenter. In this tutorial we will build the second microservice for the application and this microservice will be called ProcessCenter microservice. This second microservice will communicate with the first microservice in synchronous manner.
You can find the complete Source Code at my GitHub Repository.
Page Contents
The ProcessCenter Microservice is going to have very similar features to the first microservice, these features are:
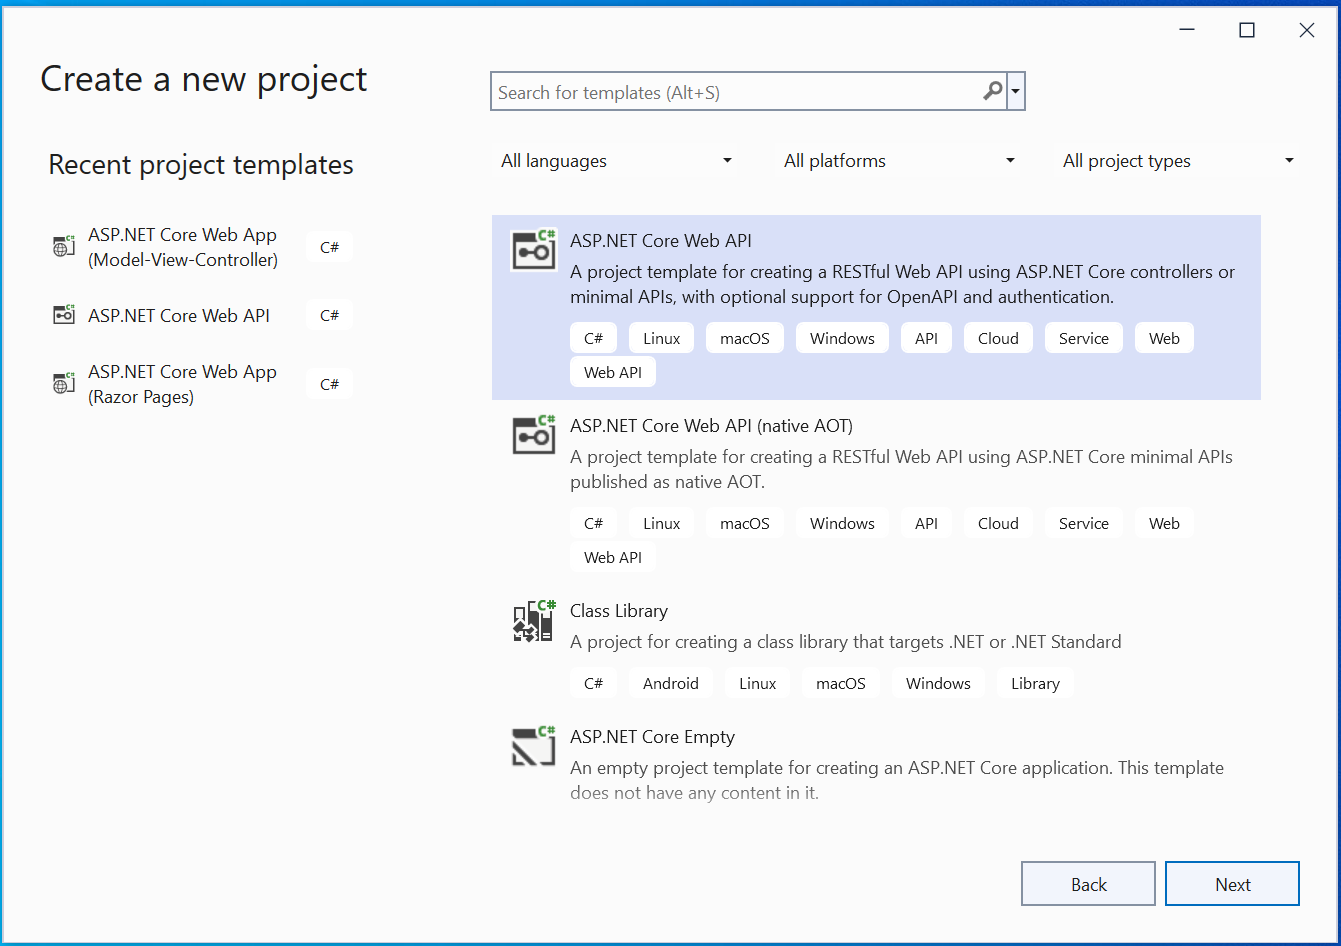
First open Visual Studio and create a new ASP.NET Core Web API project.
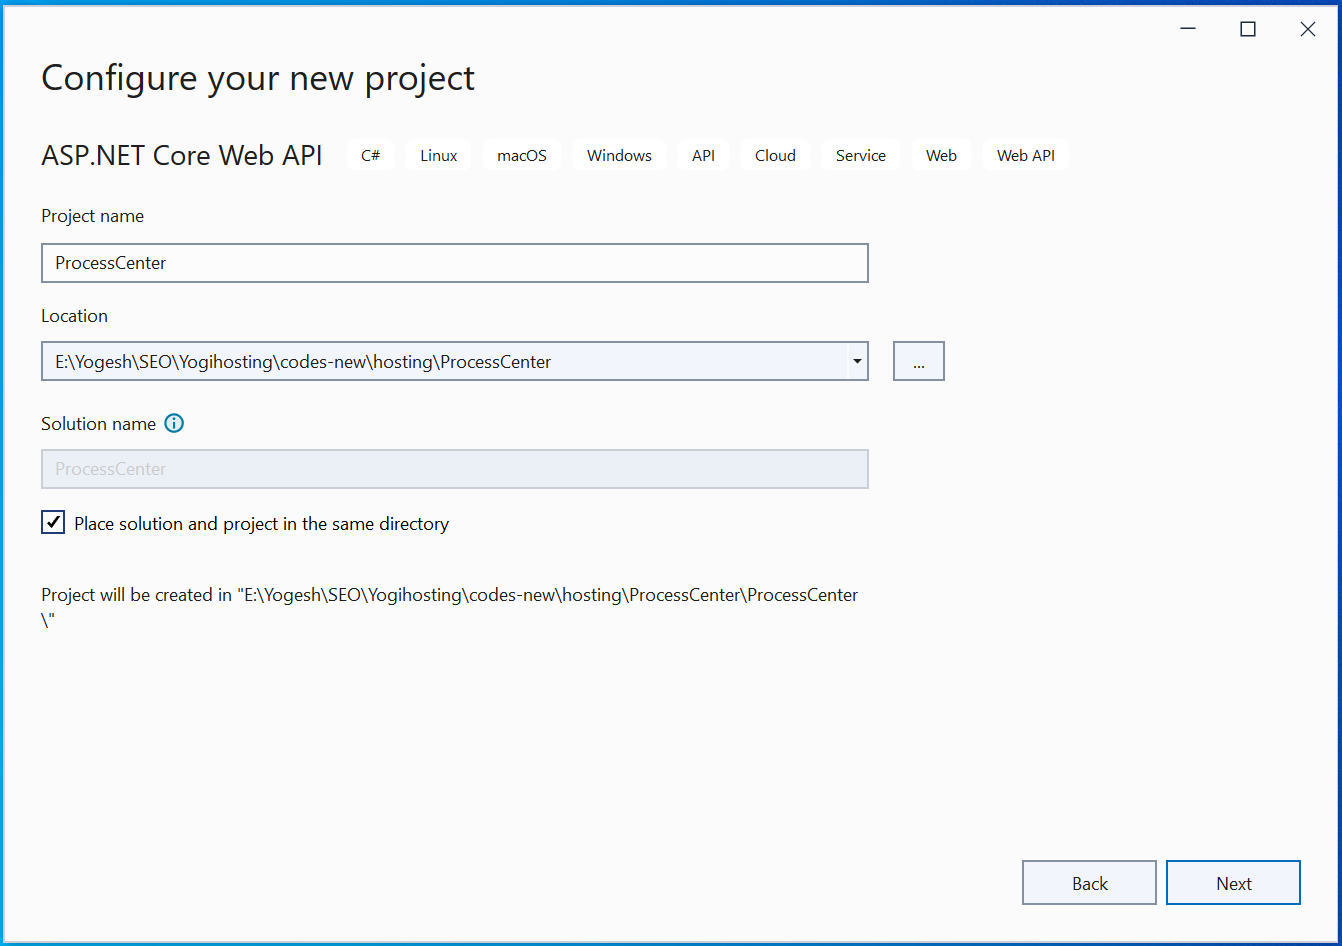
Give your app the name as ProcessCenter.
Then on the next screen select the latest version of .NET with is .NET 8.0.
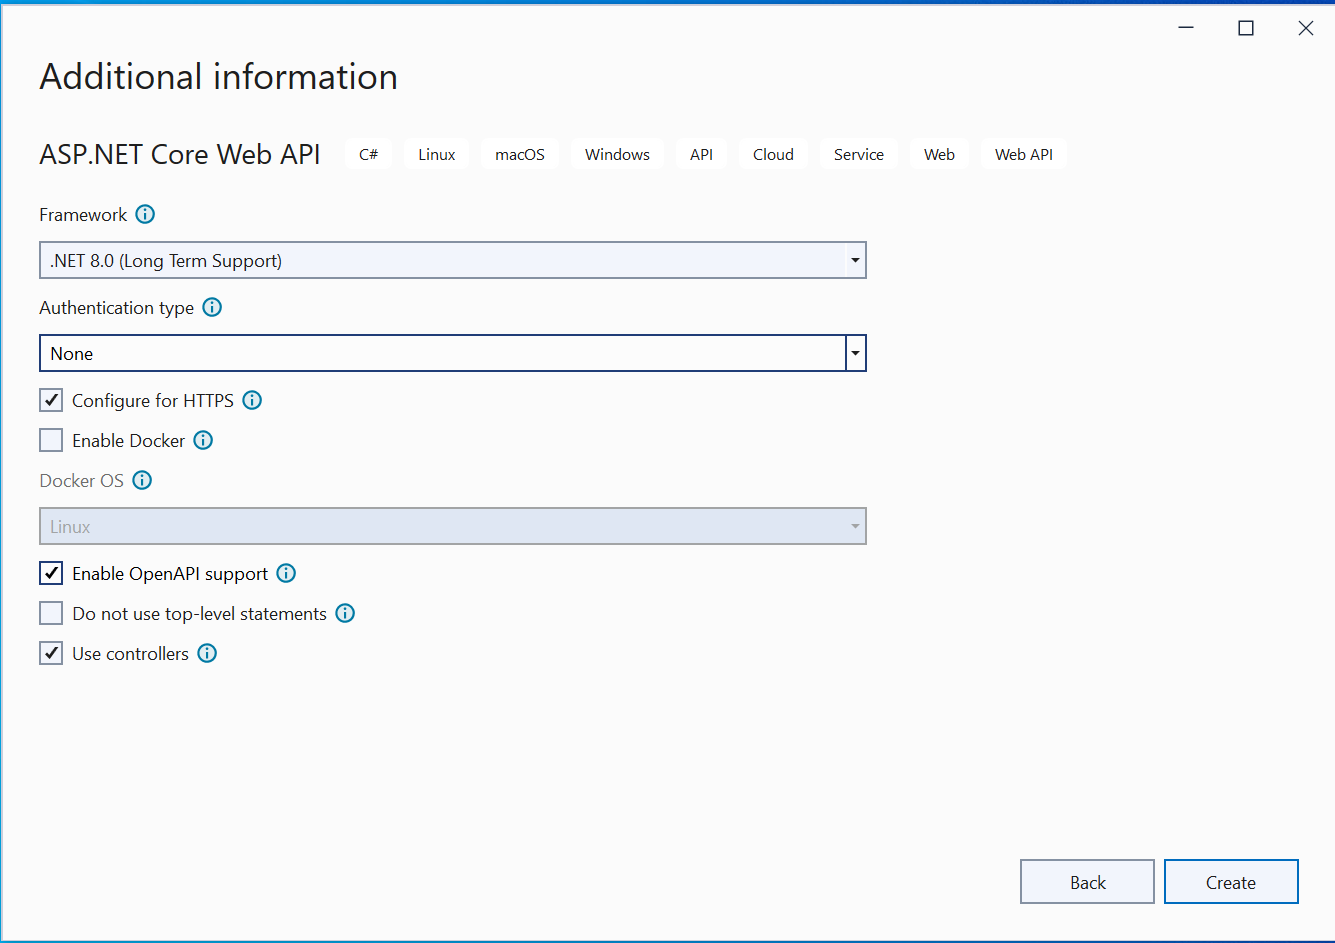
Next, click the create button to create this microservice.
This Microservice will deal with delivery of Pizza Orders by drones. There will be a MongoDB database which will store all this information.
Create a new folder called Entity on the root of the project. To this folder create 3 class files which are:
1. IEntity.cs
namespace ProcessCenter.Entity
{
    public interface IEntity
    {
        Guid Id { get; set; }
    }
}
It is the same which we used in the first microservice.
2. IRepository.cs
using System.Linq.Expressions;

namespace ProcessCenter.Entity
{
    public interface IRepository<T> where T : IEntity
    {
        Task CreateAsync(T entity);
        Task<IReadOnlyCollection<T>> GetAllAsync();
        Task<IReadOnlyCollection<T>> GetAllAsync(Expression<Func<T, bool>> filter);
        Task<T> GetAsync(Guid id);
        Task<T> GetAsync(Expression<Func<T, bool>> filter);
        Task RemoveAsync(Guid id);
        Task UpdateAsync(T entity);
    }
}
IRepository<T> is also the same which we used in the first microservice.
3. Process.cs
namespace ProcessCenter.Entity
{
    public class Process : IEntity
    {
        public Guid Id { get; set; }
        public Guid OrderId { get; set; }
        public Guid DroneId { get; set; }
        public string Status { get; set; }
        public DateTimeOffset AcquiredDate { get; set; }
    }
}
The Process class will manage the processing of pizza orders. It has 5 fields which are:
Create a new folder called Infrastructure on the root folder of the project. Next create a new class called Dtos.cs to it. It’s code is given below:
namespace ProcessCenter.Infrastructure
{
    public class Dtos
    {
        public record GrantOrderDto(Guid DroneId, Guid OrderId, String Status);

        public record ProcessDto(Guid OrderId, string Address, int Quantity, string Status, Guid ProcessId, Guid DroneId, DateTimeOffset AcquiredDate);

        public record OrderDto(Guid Id, string Address, int Quantity);
    }
}
This class has 3 Data Transfer objects aka Dtos. Note that Dtos are only used to pass data between layers and does not contain any business logic. I will be using in the Web API shortly.
I have used record type for the Dtos as they cannot be change later on.
Next, to the same Infrastructure folder, add a new class called Extensions.cs which will create an extension method for the “Process” type, and will be used to convert Process type value to ProcessDto type. Remember “ProcessDto” is the Dto we previously defined.
The code is given below:
using ProcessCenter.Entity;
using static ProcessCenter.Infrastructure.Dtos;

namespace ProcessCenter.Infrastructure
{
    public static class Extensions
    {
        public static ProcessDto AsDto(this Process process, string Address, int Quantity)
        {
            return new ProcessDto(process.OrderId, Address, Quantity, process.Status, process.Id, process.DroneId, process.AcquiredDate);
        }
    }
}
Like what we did when creating our first Microservice, these things will remain the same.
In the appsettings.json file, add 2 sections called “ServiceSettings” and “MongoDbSettings” as highlighted below.
{
  "Logging": {
    "LogLevel": {
      "Default": "Information",
      "Microsoft": "Warning",
      "Microsoft.Hosting.Lifetime": "Information"
    }
  },
  "ServiceSettings": {
    "ServiceName": "Process"
  },
  "MongoDbSettings": {
    "Host": "localhost",
    "Port": "27017"
  },
  "AllowedHosts": "*"
}
The only difference is that here I have provided ServiceName the value of Process so for this Microservice a database by the name of Process will be created on MongoDB.
Now create the necessary classes that will deal with these MongoDB values. So on this step too the things just remain the same like the first microservice.
Create a new folder called Setting on the root of the project and create 2 classes called MongoDbSettings.cs and ServiceSettings.cs to it.
The code of MongoDbSettings.cs class is:
namespace ProcessCenter.Setting
{
    public class MongoDbSettings
    {
        public string Host { get; init; }
        public string Port { get; init; }

        public string ConnectionString => $"mongodb://{Host}:{Port}";
    }
}
The code of ServiceSettings.cs class is:
namespace ProcessCenter.Setting
{
    public class ServiceSettings
    {
        public string ServiceName { get; init; }
    }
}
Before we create repository which will directly communicate with the MongoDB database, we will require to have drivers for MongoDB installed in the project. This can be done by adding the MongoDB.Driver package from NuGet.
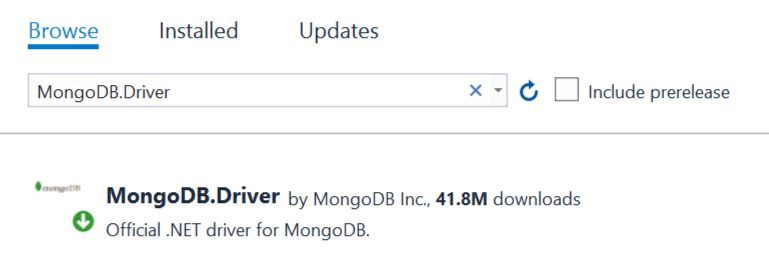
Now create a new folder called MongoDB on the root of the project and add 2 classes called MongoRepository.cs and Extensions.cs to it. These classes are the same what we used in the first microservice we build previously.
The MongoRepository.cs code:
using MongoDB.Driver;
using ProcessCenter.Entity;
using System.Linq.Expressions;

namespace ProcessCenter.MongoDB
{
    public class MongoRepository<T> : IRepository<T> where T : IEntity
    {
        private readonly IMongoCollection<T> collection;
        private readonly FilterDefinitionBuilder<T> filterBuilder = Builders<T>.Filter;

        public MongoRepository(IMongoDatabase database, string collectionName)
        {
            collection = database.GetCollection<T>(collectionName);
        }

        public async Task<IReadOnlyCollection<T>> GetAllAsync()
        {
            return await collection.Find(filterBuilder.Empty).ToListAsync();
        }

        public async Task<IReadOnlyCollection<T>> GetAllAsync(Expression<Func<T, bool>> filter)
        {
            return await collection.Find(filter).ToListAsync();
        }

        public async Task<T> GetAsync(Guid id)
        {
            FilterDefinition<T> filter = filterBuilder.Eq(e => e.Id, id);
            return await collection.Find(filter).FirstOrDefaultAsync();
        }

        public async Task<T> GetAsync(Expression<Func<T, bool>> filter)
        {
            return await collection.Find(filter).FirstOrDefaultAsync();
        }

        public async Task CreateAsync(T entity)
        {
            if (entity == null)
            {
                throw new ArgumentNullException(nameof(entity));
            }
            await collection.InsertOneAsync(entity);
        }

        public async Task UpdateAsync(T entity)
        {
            if (entity == null)
            {
                throw new ArgumentNullException(nameof(entity));
            }
            FilterDefinition<T> filter = filterBuilder.Eq(e => e.Id, entity.Id);
            await collection.ReplaceOneAsync(filter, entity);
        }

        public async Task RemoveAsync(Guid id)
        {
            FilterDefinition<T> filter = filterBuilder.Eq(e => e.Id, id);
            await collection.DeleteOneAsync(filter);
        }
    }
}
The Extensions.cs code:
using MongoDB.Bson.Serialization.Serializers;
using MongoDB.Bson.Serialization;
using MongoDB.Bson;
using MongoDB.Driver;
using ProcessCenter.Entity;
using ProcessCenter.Setting;

namespace ProcessCenter.MongoDB
{
    public static class Extensions
    {
        public static IServiceCollection AddMongo(this IServiceCollection services)
        {
            BsonSerializer.RegisterSerializer(new GuidSerializer(BsonType.String));
            BsonSerializer.RegisterSerializer(new DateTimeOffsetSerializer(BsonType.String));

            services.AddSingleton(a =>
            {
                var configuration = a.GetService<IConfiguration>();
                var serviceSettings = configuration.GetSection(nameof(ServiceSettings)).Get<ServiceSettings>();
                var mongoDbSettings = configuration.GetSection(nameof(MongoDbSettings)).Get<MongoDbSettings>();
                var mongoClient = new MongoClient(mongoDbSettings.ConnectionString);
                return mongoClient.GetDatabase(serviceSettings.ServiceName);
            });

            return services;
        }

        public static IServiceCollection AddMongoRepository<T>(this IServiceCollection services, string collectionName) where T : IEntity
        {
            services.AddSingleton<IRepository<T>>(a =>
            {
                var database = a.GetService<IMongoDatabase>();
                return new MongoRepository<T>(database, collectionName);
            });
            return services;
        }
    }
}
Now, we will need to register the methods, given on the Extensions.cs class, in the Program.cs class. So add the following code to it.
builder.Services.AddMongo().AddMongoRepository<Process>("processItems");Note that processItems will be the collection name for the MongoDB database.
The second microservice should be able to communicate with the first microservice. This we can do with HttpClient class. So, create a new folder called Client on the root of the project and to it add a new class called OrderClient.cs. This class will make Web API requests to the OrderCenter Microservice and uses HttpClient class for doing so. The code of OrderClient.cs is given below:
using static ProcessCenter.Infrastructure.Dtos;

namespace ProcessCenter.Client
{
    public class OrderClient
    {
        private readonly HttpClient httpClient;
        public OrderClient(HttpClient httpClient)
        {
            this.httpClient = httpClient;
        }

        public async Task<IReadOnlyCollection<OrderDto>> GetOrderAsync()
        {
            var items = await httpClient.GetFromJsonAsync<IReadOnlyCollection<OrderDto>>("/order");
            return items;
        }
    }
}
The call to the first microservice is made inside the GetOrderAsync method. Recall /Order was the route of the web api we created in the first tutorial.
Next, register the OrderClient class on the “Program.cs” and specify the baseaddress of the first microservice.
builder.Services.AddHttpClient<OrderClient>(a =>
{
    a.BaseAddress = new Uri("https://localhost:44393");
});
The uri – https://localhost:44393 is that of the first microservice we created before.
Next, we will create the web api controller.
We will now create a Web API controller called ProcessController.cs inside the Controllers folder. It will have methods that will insert data to the MongoDB database and also make asynchronous call to the first microservice to get order details.
The data will be stored in a MongoDB database like before and the MongoDB will run from a docker container. On the last tutorial I explained Running MongoDB Database from a Docker Container so make sure you have followed that part correctly. If MongoDB container is not running then run it by the command – docker-compose up -d.
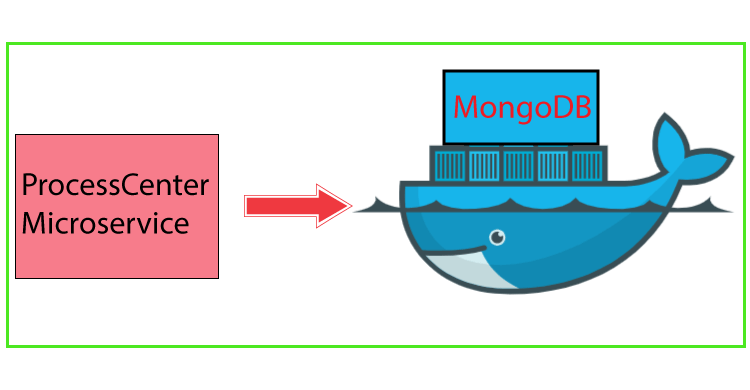
So, create ProcessController.cs inside the Controllers folder with the following code.
using Microsoft.AspNetCore.Mvc;
using ProcessCenter.Client;
using ProcessCenter.Entity;
using ProcessCenter.Infrastructure;
using static ProcessCenter.Infrastructure.Dtos;

namespace ProcessCenter.Controllers
{
    [ApiController]
    [Route("process")]
    public class ProcessController : ControllerBase
    {
        private readonly IRepository<Process> repository;
        private readonly OrderClient orderClient;
        public ProcessController(IRepository<Process> repository, OrderClient orderClient)
        {
            this.repository = repository;
            this.orderClient = orderClient;
        }

        [HttpGet]
        public async Task<ActionResult<IEnumerable<ProcessDto>>> GetAsync(Guid droneId)
        {
            if (droneId == Guid.Empty)
            {
                return BadRequest();
            }

            var orders = await orderClient.GetOrderAsync();
            var processEntities = await repository.GetAllAsync(a => a.DroneId == droneId);

            var commonEntities = processEntities.Join(orders, a => a.OrderId, b => b.Id, (a, b) => new { OrderId = b.Id, b.Address, b.Quantity, ProcessId = a.Id, a.DroneId, a.Status, a.AcquiredDate });

            List<ProcessDto> processDtoList = new List<ProcessDto>();

            foreach (var ce in commonEntities)
            {
                Process p = new Process();
                p.Id = ce.ProcessId; p.DroneId = ce.DroneId; p.OrderId = ce.OrderId; p.Status = ce.Status; p.AcquiredDate = ce.AcquiredDate;
                processDtoList.Add(p.AsDto(ce.Address, ce.Quantity));
            }

            return Ok(processDtoList);
        }

        [HttpPost]
        public async Task<ActionResult> PostAsync(GrantOrderDto grantOrderDto)
        {
            var process = await repository.GetAsync(a => a.DroneId == grantOrderDto.DroneId && a.OrderId == grantOrderDto.OrderId);
            if (process == null)
            {
                process = new Process
                {
                    DroneId = grantOrderDto.DroneId,
                    OrderId = grantOrderDto.OrderId,
                    Status = grantOrderDto.Status,
                    AcquiredDate = DateTimeOffset.UtcNow
                };

                await repository.CreateAsync(process);
            }
            else
            {
                process.Status = grantOrderDto.Status;
                await repository.UpdateAsync(process);
            }
            return Ok();
        }
    }
}
It has 2 methods:
1. GetAsync() – it fetches the process recrods from it’s local mongodb database and also makes http request to the first microservice to get all the orders. It then combines both these two and returns it as a List of ProcessDto.
2. PostAsync() – this method creates a new process record in the mongodb database. This method also updates the process record.
Let us now test this method so run both the microservices – CommandCenter and ProcessCenter in visual studio.
Open Postman which is a popular API client that makes it easy for developers to create, share, test and document APIs.
You can also use Swagger in place of Postman if you wish to.
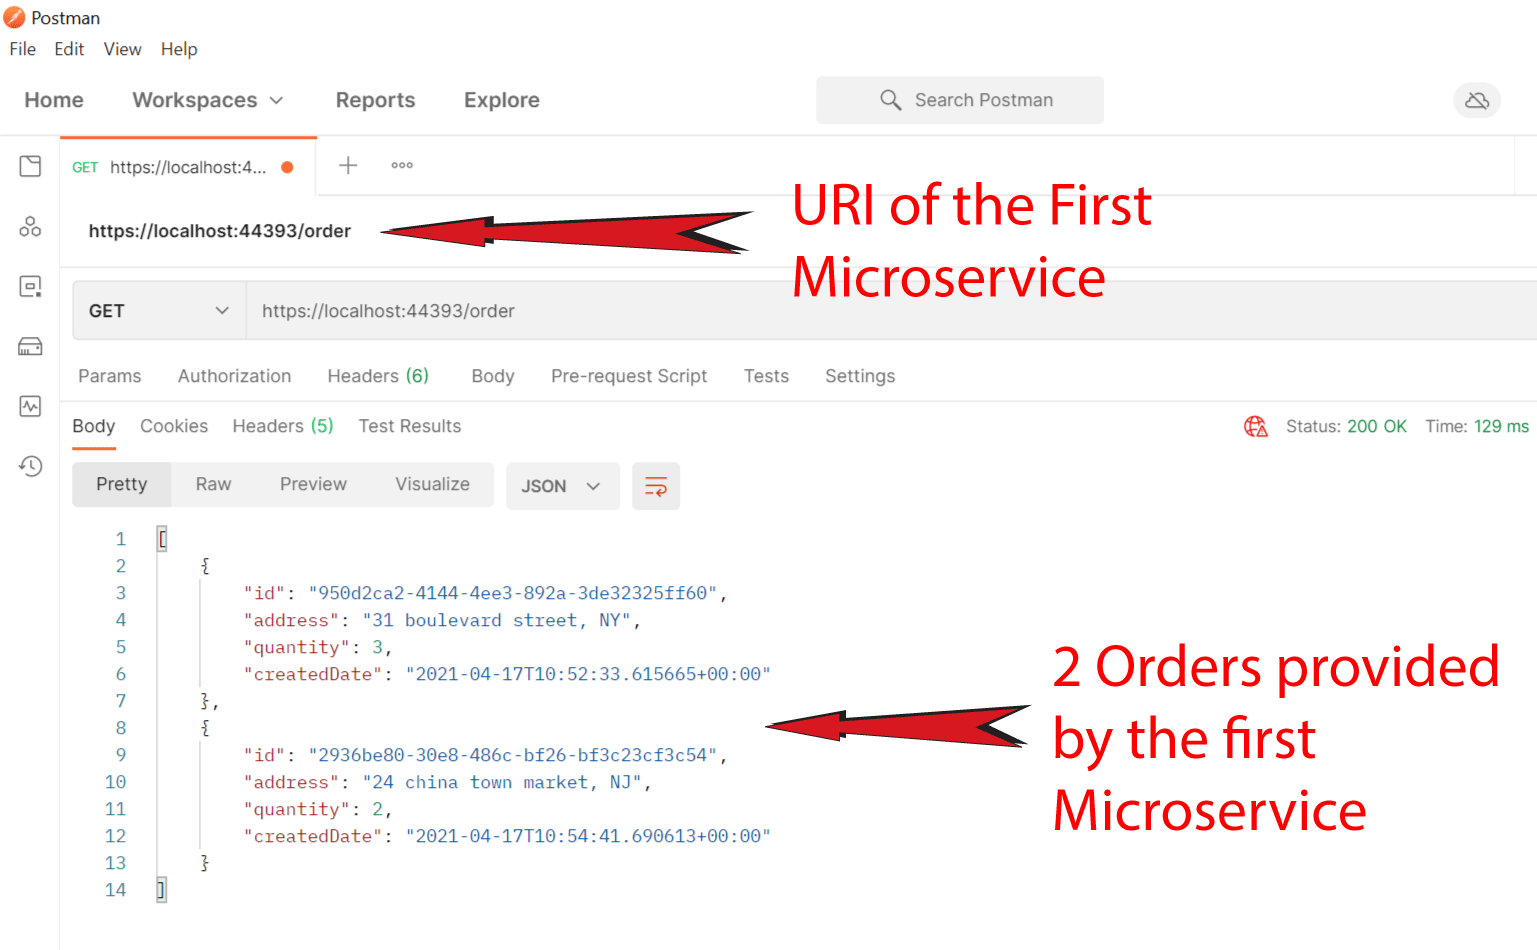
Now we will makes an API call to the first microservice in postman. For this make sure the CommandCenter app is open in Visual Studio and in running mode. Also make sure the MonogDB database is running inside the Docker container.
Now select “GET” in the dropdown and put the uri of the first microservice on the textbox next to it. The URI of the first microservice is https://localhost:44393/order. It will show you the total number of orders, on my side I have 2 orders right now. See the below image:
Now it’s time to execute the 2nd microservice. So run the project in Visual Studio.
The method to be executed is PostAsync of the ProcessController. So, in Postman:
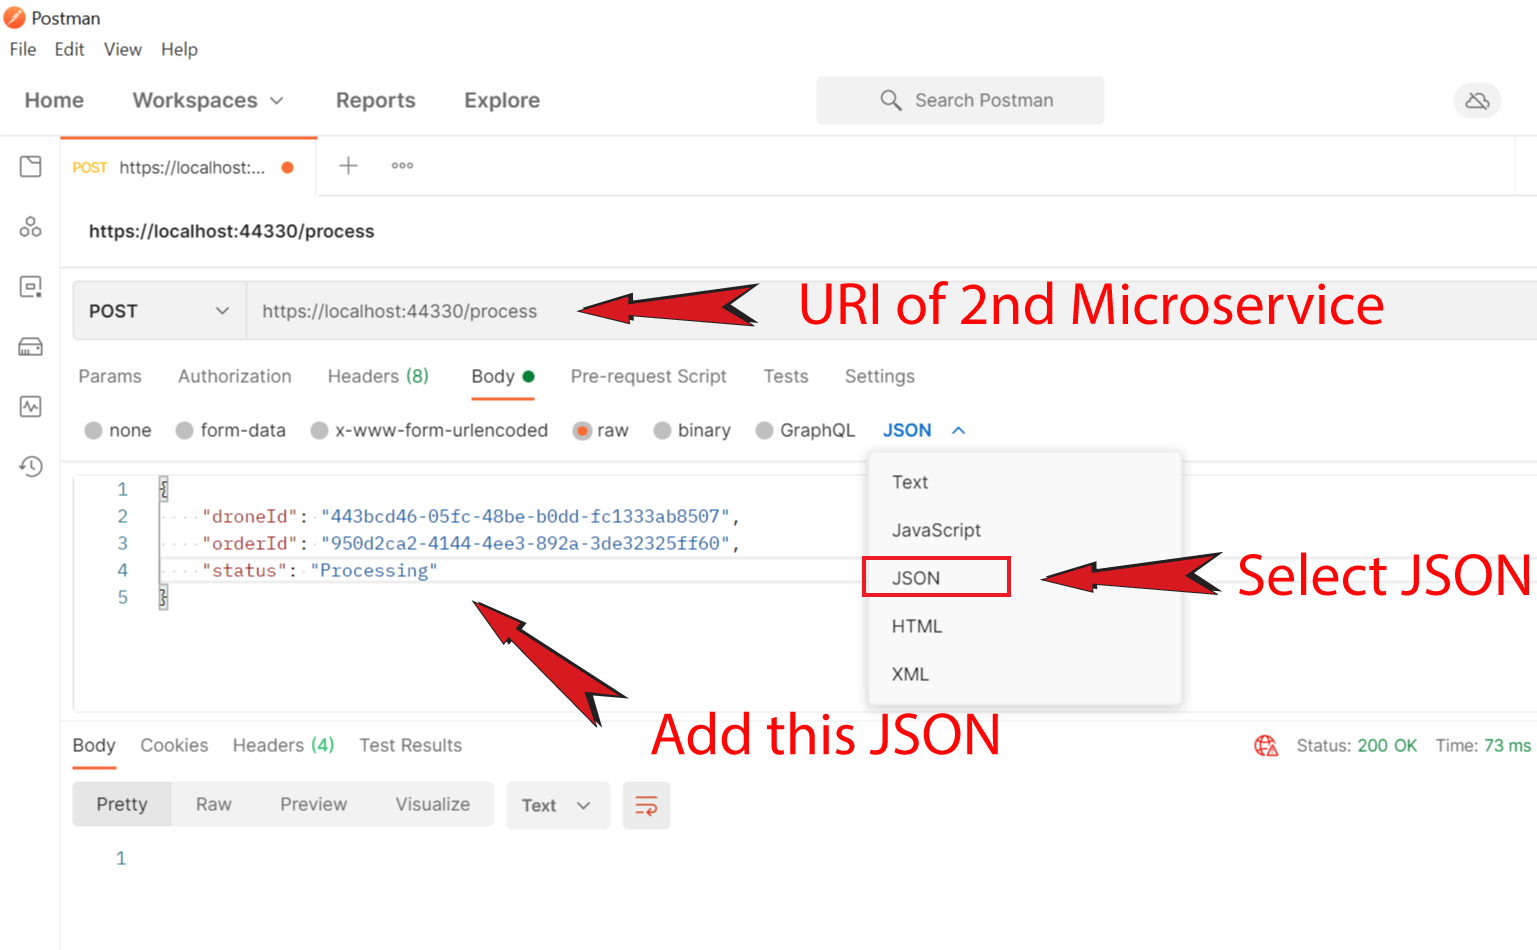
Next on the big box add the value of the process record in json as shown below.
{
    "droneId": "443bcd46-05fc-48be-b0dd-fc1333ab8507",
    "orderId": "950d2ca2-4144-4ee3-892a-3de32325ff60",
    "status": "Processing"
}
The droneid value can be any guid value. Order Id value should be any of the order value created in the first microservice. So, copy the value from there.
Finally click the Send button to create the Process record in the MongoDB database.
Now check the Process record is created on the MongoDB database. See the below image:
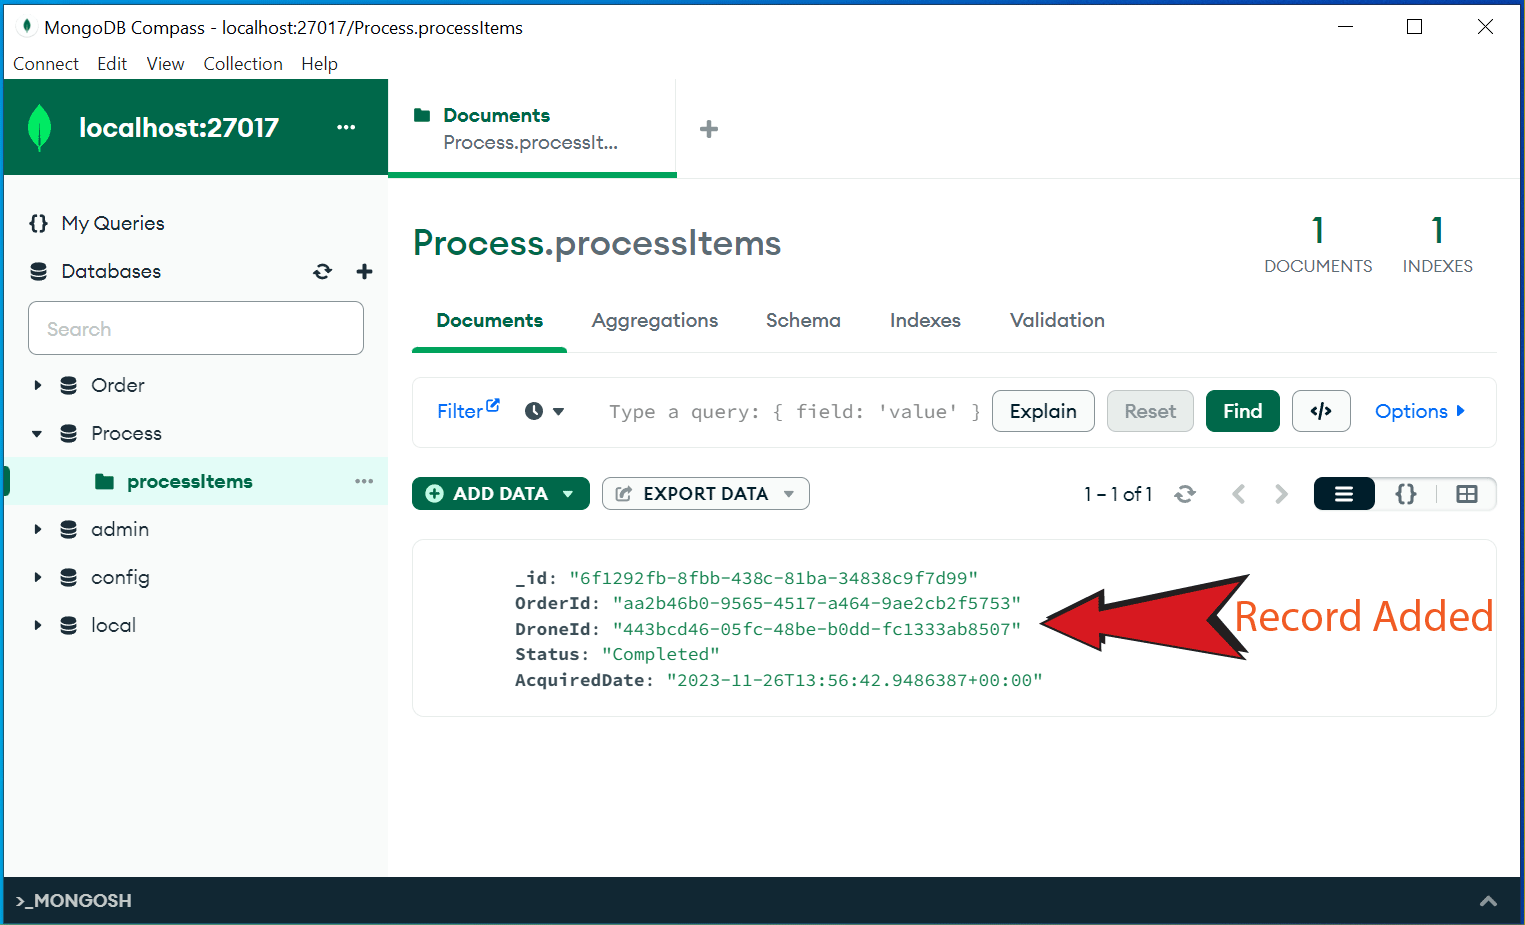
Now we will execute the method called GetAsync of the ProcessController. This method fetches the process records from the mongodb database and also makes API call to the first microservice and then combines them together.
So, in Postman:
I have shown this is the below image:
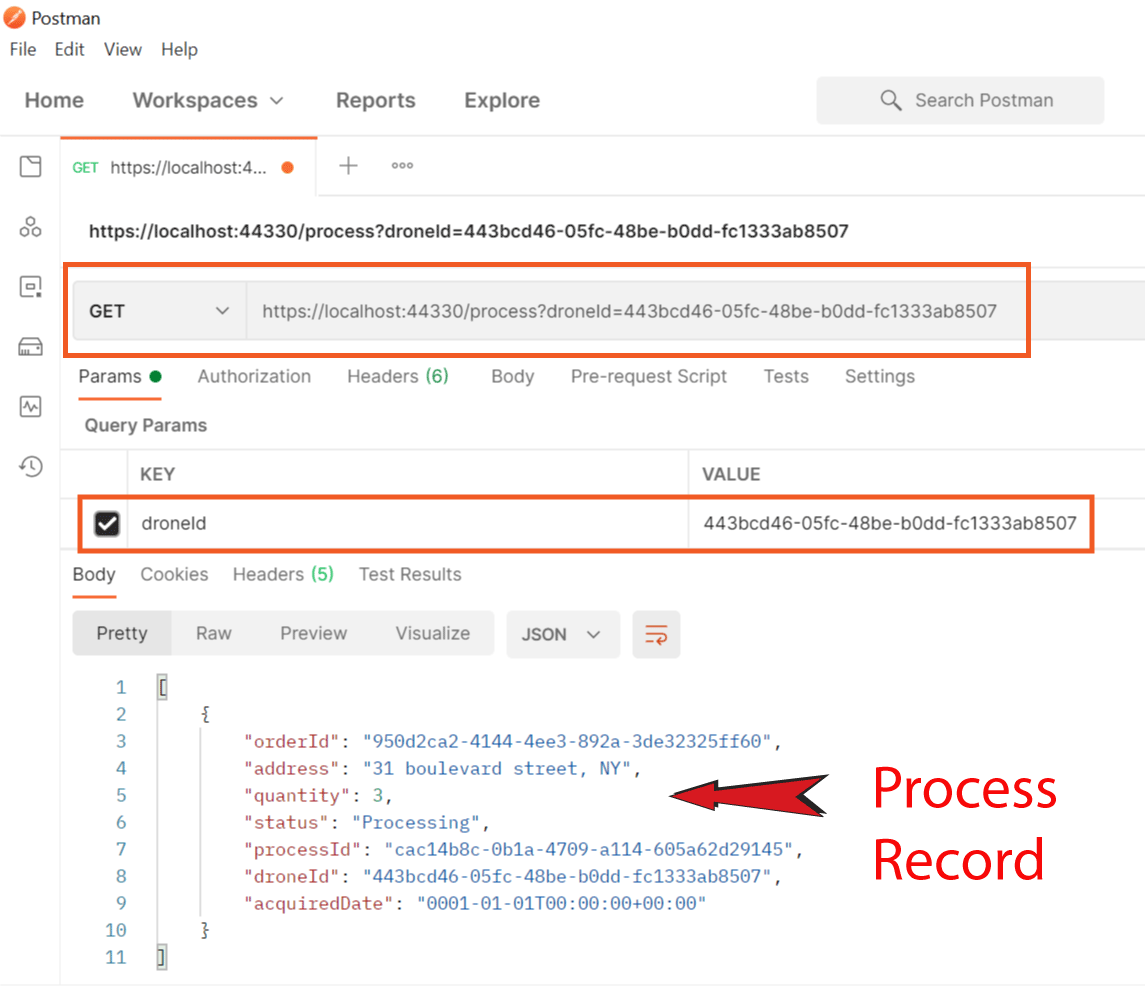
Note that this method will show the combined order from the first microservice and the second microservice. The JSON returned is given below.
[
    {
        "orderId": "950d2ca2-4144-4ee3-892a-3de32325ff60",
        "address": "31 boulevard street, NY",
        "quantity": 3,
        "status": "Processing",
        "processId": "cac14b8c-0b1a-4709-a114-605a62d29145",
        "droneId": "443bcd46-05fc-48be-b0dd-fc1333ab8507",
        "acquiredDate": "2021-04-17T11:49:21.8892414+00:00"
    }
]
Note that the first 3 field are coming from first microservice while the others are coming from second microservice.
The same method called PostAsync of the ProcessController updates the Process records too. If a record with a given droneid and ordereid is already in the database then the record is updated. So let us update the status of the record to “Completed”.
In Postman:
Next on the big box add the value of the process record in json as shown below.
{
    "droneId": "443bcd46-05fc-48be-b0dd-fc1333ab8507",
    "orderId": "950d2ca2-4144-4ee3-892a-3de32325ff60",
    "status": "Completed"
}
Finally click the Send button to update the Process record status value to “Completed”.
We have 2 Microservices – “CommandCenter” and “ProcessCenter”. We know that the GetAsync method given in the ProcessController of ProcessCenter microservice calls the CommandCenter microservice to get Order records. Now if the CommandCenter microservice is in fault then the ProcessCenter microservice makes a single call, waits for a few seconds and it will also fail.

We have not added any fault-handling capability to the ProcessCenter microservice. In this section we are just going to do that by using a .NET library called Polly. Polly helps to apply policies such as Retry, Circuit Breaker, Bulkhead Isolation, Timeout, and Fallback.
So add NuGet package Microsoft.Extensions.Http.Polly to the ProcessCenter microservice. Now in the Program class use AddTransientHttpErrorPolicy and AddPolicyHandler methods as shown below:
builder.Services.AddHttpClient<OrderClient>(a =>
{
    a.BaseAddress = new Uri("https://localhost:44393");
})
.AddTransientHttpErrorPolicy(b => b.Or<TimeoutRejectedException>().WaitAndRetryAsync(
    5,
    c => TimeSpan.FromSeconds(Math.Pow(2, c))
))
.AddPolicyHandler(Policy.TimeoutAsync<HttpResponseMessage>(1));
The AddPolicyHandler method is used to create a policy hander to specify how long to wait before a request is considered to be failed. I have specified this time to be 1 second.
AddPolicyHandler(Policy.TimeoutAsync<HttpResponseMessage>(1));The AddTransientHttpErrorPolicy method is used to configure the wait and retry policy. I have specified total of 5 retries and there should be an exponential wait between retries. This exponential retry is in the power of 2.
So, after first retry it will wait for 2 pow 1 = 2 seconds. Similarly, after 3rd retry, it will wait for 2 pow 3 = 8 second’s time.
AddTransientHttpErrorPolicy(b => b.Or<TimeoutRejectedException>().WaitAndRetryAsync(
    5,
    c => TimeSpan.FromSeconds(Math.Pow(2, c))
))
So, Polly makes this approach very helpful as request made to microservice does not fail after just a single retry but instead we can set the number of retries to perform and waiting period between retries, before a request is considered to be failed.
The Circuit Breaker Pattern prevents the Microservice from performing an operation that is likely to fail. Suppose the CommandCenter microservice is not 100% healthy so 8 out of 10 requests made to it are failing.
In such a situation the Circuit breaker will open the circuit which means it will not let any request to be made to the CommandCenter microservice. So, request will fail right await. It will keep the circuit opened for a specified number of seconds, and hope that the CommandCenter microservice will become healthy once again during this period.

After the specified time has passed, it will close the circuit and this will allow all the request made to the CommandCenter microservice to go on normally. Circuit breaker pattern helps in managing the limited resources of the microservices efficiently.
The Circuit Breaker Pattern is added to the Program class. See the below highlighted code where I have specified to break the circuit after 3 failures and keep it on the circuit open state for 15 seconds time.
builder.Services.AddHttpClient<OrderClient>(a =>
{
    a.BaseAddress = new Uri("https://localhost:44393");
})
.AddTransientHttpErrorPolicy(b => b.Or<TimeoutRejectedException>().WaitAndRetryAsync(
    5,
    c => TimeSpan.FromSeconds(Math.Pow(2, c))
))
.AddTransientHttpErrorPolicy(b => b.Or<TimeoutRejectedException>().CircuitBreakerAsync(
    3,
    TimeSpan.FromSeconds(15)
))
.AddPolicyHandler(Policy.TimeoutAsync<HttpResponseMessage>(1));
So, after 15 seconds the circuit will be closed once again and request will work normally.
In this tutorial we created our 2nd Microservice and crated mechanism to communicate with the first microservice using HttpClient class. We also implemented Polly to configure retries, timeout and Circuit breaker patterns. In the next tutorial we will integrate API Gateway to the Microservices.
SHARE THIS ARTICLE